NetSuite Source Connector
The NetSuite source connector lets DataSync retrieve data from NetSuite and load it into your data warehouse. Before creating a connection in DataSync, you need to set up a custom application in NetSuite to generate the credentials required for the connection.
NetSuite connections involve two independent choices. The API schema controls how DataSync queries your data: SuiteTalk gives you full access to custom records, fields, and lists, while SuiteQL is a SQL-like interface built for data retrieval. The authentication mode is either Token-Based Authentication or OAuthHeadless. Keep in mind that SuiteTalk only works with Token-Based Authentication.
Once your source connection is ready, configure your destination connection to finish the setup.
A NetSuite account with Administration permissions is required to configure the connection.
API Schemas
NetSuite supports two API schemas for retrieving data. Choose the one that fits your use case before setting up the connection.
| API schema | What it does |
|---|---|
| SuiteQL | A SQL-like interface built for querying NetSuite data. Supports joins, grouping, aggregations, and column selection. Good fit when you only need to read data. |
| SuiteTalk | A SOAP-based interface with full access to custom records, fields, and lists, including saved searches. Grouping and aggregations are processed on the client side. Only works with Token-Based Authentication. |
Step 1: Set up NetSuite
The setup process depends on the authentication mode you are using. Token-Based Authentication is required for SuiteTalk connections. OAuthHeadless is available for SuiteQL and keeps connections active for up to 7 days before requiring reauthentication.
- Token-Based Authentication
- OAuthHeadless Authentication
Token-Based Authentication
Create an integration
- Log in to NetSuite with an administrator account.
- Under Setup, select Integration, then Manage Integrations.
- Click New.
- Enter a name and description for the integration.
- Set the Concurrency Limit (maximum 5 sessions).
- Under Authentication, enable Token-Based Authentication.
- Click Save and copy the Client ID and Client Secret. You will need both in DataSync.
Enable the Token-Based authentication feature
- In the Setup tab, click Company.
- Select Enable Features.
- Under SuiteCloud, select Manage Authentication.
- Enable Token-Based Authentication.
- Save your changes.
Create or edit a role
- In the Setup tab, select User/Roles.
- Click Manage Roles.
- In General, enable Core Administration Permissions.
- In Subsidiary Restrictions, select All and check Allow cross-subsidiary record viewing.
- Under Permissions and Setup, add:
- Access Token Management (Full)
- Log in using Access Tokens (Full)
- REST Web Services (Full) SuiteQL only
- SOAP Web Services (Full) SuiteQL only
- Set Up SOAP Web Services (Full)
- User Access Token (Full)
- In Reports, add SuiteAnalytics Workbook (Edit).
- (Optional) Add permissions for your target tables under Transactions and Lists.
Assign a role to a user
- In the List tab, select Employees.
- Open the target employee record.
- Under Access, then Roles, assign the role created above.
- Save.
Create an access token
- In the Setup tab, select User/Roles, then Access Tokens.
- Create a new access token.
- Select the integration application, target user, and role.
- Select Save and copy the Access Token and Token Secret. You will need both in DataSync.
OAuthHeadless Authentication
- Log in to NetSuite with an administrator account.
- Under Setup, select Integration, then Manage Integrations.
- Select New.
- Enter a name and description for the integration.
- Set the Concurrency Limit (maximum 5 sessions).
- Enable TBA: Issue token endpoint and TBA: Authorization Flow.
- Open DataSync and start creating the source connection. Copy the Callback URL from the Connection Properties panel.
- Back in NetSuite, paste the Callback URL into both the Callback URL and Redirect URI fields.
- Enable Authorization Code Grant and Public Client.
- Select the appropriate scopes. Restlets and Rest Web Services are recommended.
- Set OAuth 2.0 Consent Policy to Always Ask.
- Select User Credentials.
- Select Save and copy the Client ID and Client Secret. You will need both in DataSync.
NetSuite permissions
These permissions apply when creating a custom role for Token-Based Authentication. If using the Administrator role with OAuthHeadless, all required permissions are already included.
| Permission | What it does | Access Level |
|---|---|---|
| SuiteAnalytics Workbook | Access to SQL queries in SuiteAnalytics. | View |
| Customer | Sample customer access for testing RESTlet connections. | View |
| Access Token Management | Creation and management of access tokens for Token-Based Authentication. | |
| Custom <type> Fields | Access to custom fields of the selected type. Required when using Include Custom List Columns. Covers Custom Column, Entity, Entry, Item, Transaction, and other Custom Fields. | View |
| Other Custom Fields | Access to other custom field types. Used with Include Custom Field Columns. | View |
| Custom Lists | Metadata access for custom list tables. Used with Include Custom List Tables. | View |
| Custom Record Types | Metadata access for custom record tables. Used with Include Custom Record Tables. | View |
| Deleted Records | Access to information about deleted records. | View |
| Log in Using Access Tokens | Authentication access to REST or SOAP services using a token. | |
| Log In using OAuth 2.0 | Authentication access to REST services using OAuth 2.0. | |
| REST Web Services | RESTlet and web service access. Required when the schema is set to SuiteQL. | |
| SOAP Web Services | SOAP web service access. Required for SuiteTalk connections and some custom field operations. | |
| User Access Tokens | Creation of user-specific tokens with Token-Based Authentication. | |
| [Custom Record Name] | Access to the specified custom record table. |
Step 2: Create the source connection in DataSync
- Log in to DataSync.
- From the welcome screen, select Connections.
- Next to Source Connections, click New.
- Select NetSuite.
- Enter all required connection properties.
- (Optional) In the Additional Connection Properties panel, click Add property and enter any extra parameters you need.
- Configure the advanced settings to match your environment, including Tracking Type.
- Click Save. For OAuthHeadless connections, you will be redirected to an authorization page.
- Click Continue to complete.
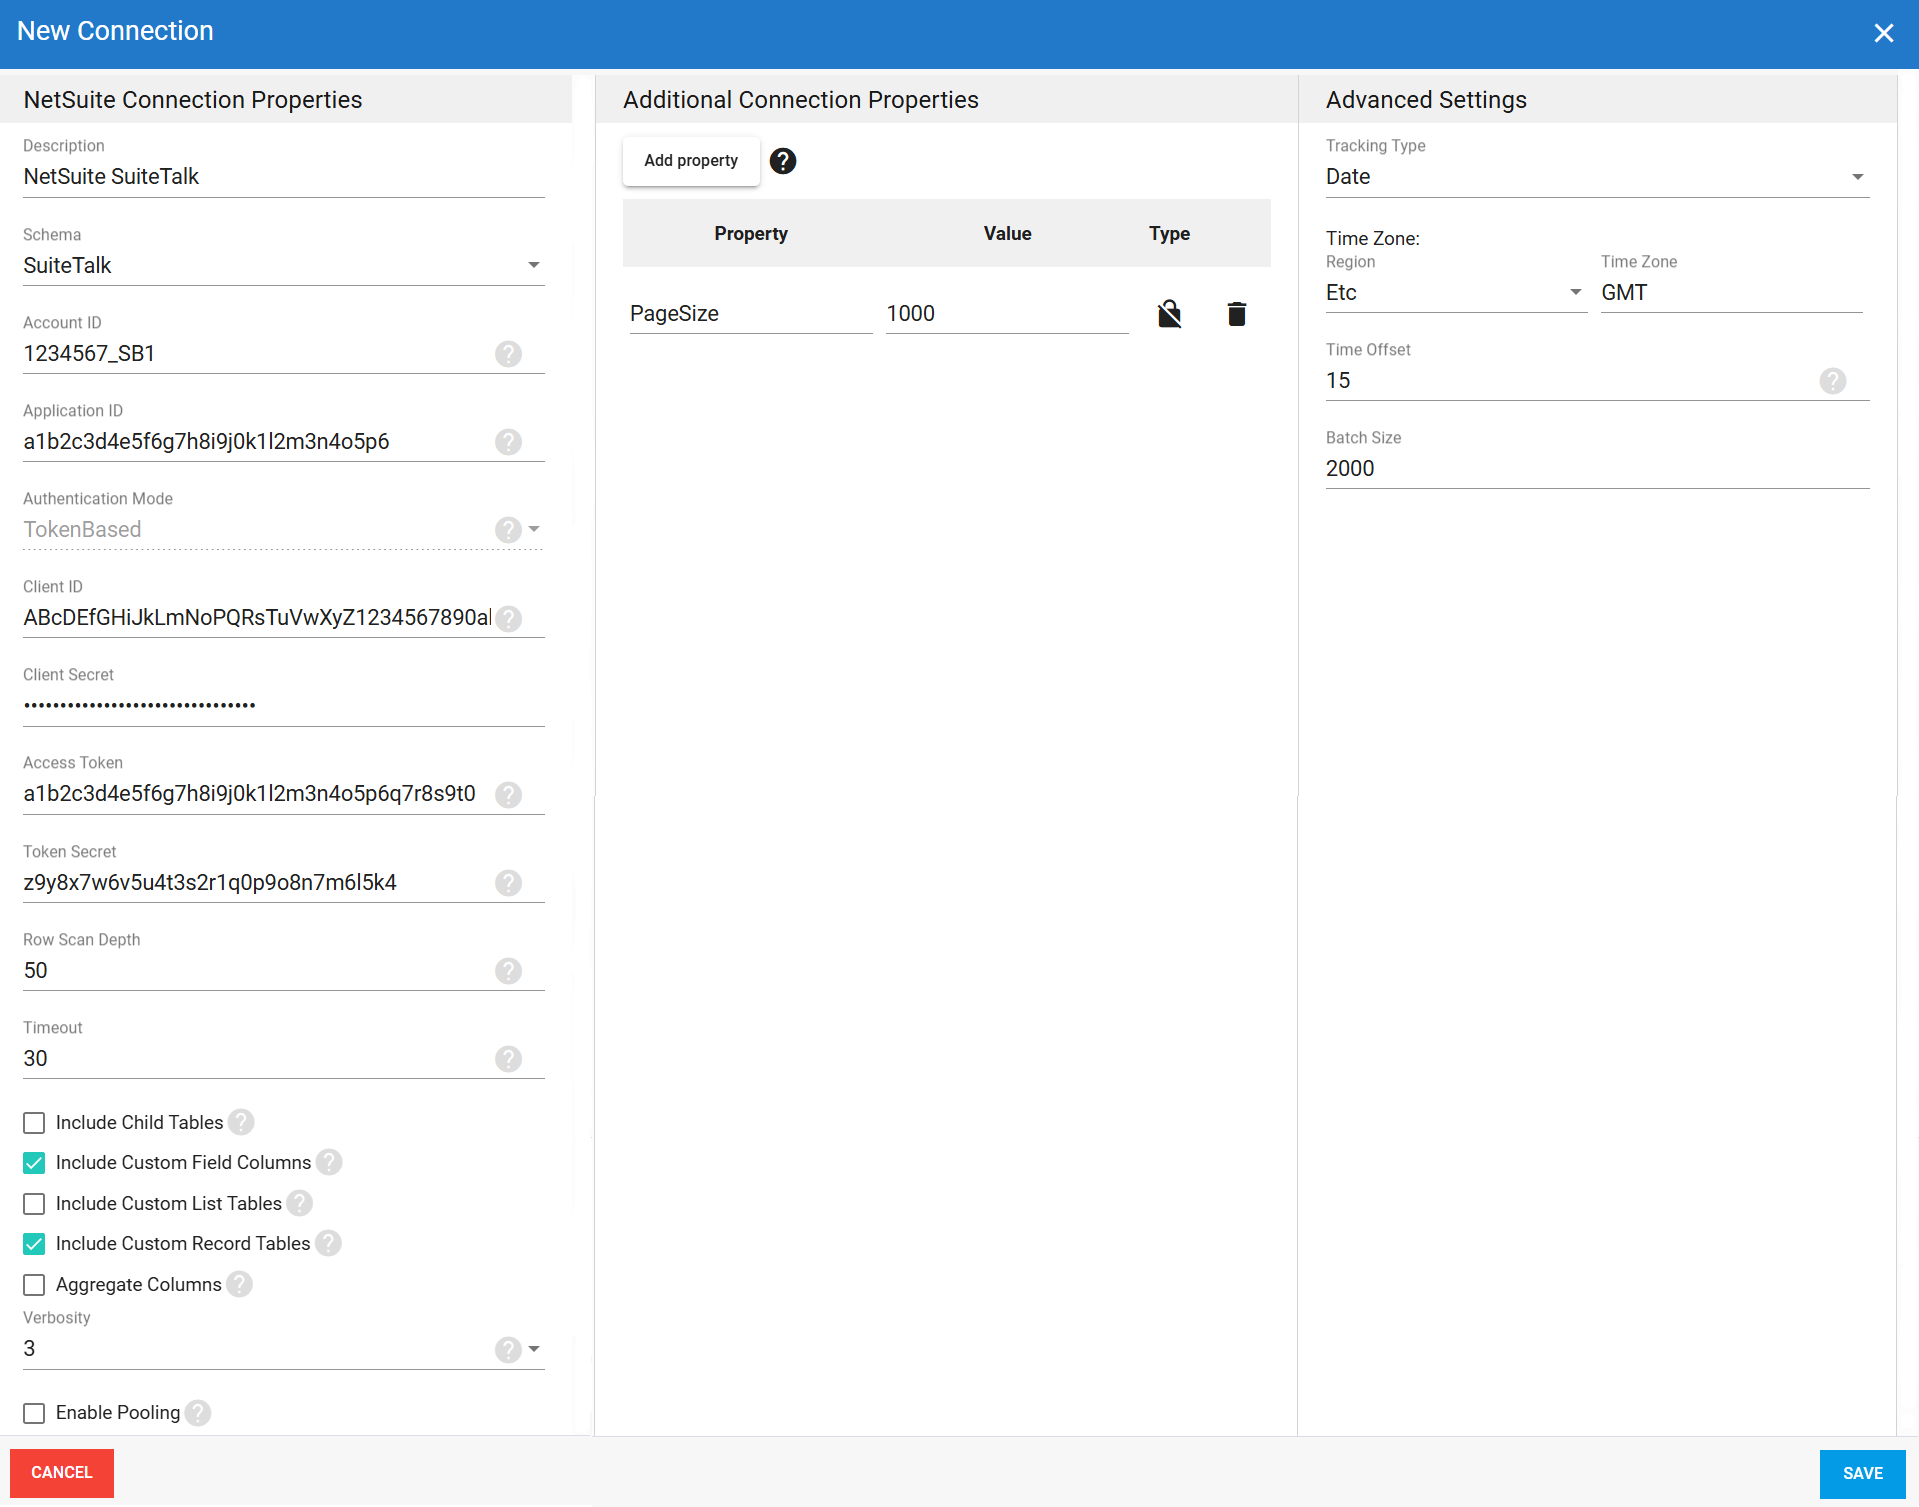
Connection properties
| Property | What to enter |
|---|---|
| Description | Unique name for the connection. Example: NetSuite. |
| Schema | API schema for the connection: SuiteQL or SuiteTalk. SuiteTalk requires Token-Based Authentication. |
| Account ID | NetSuite account identifier. Found under Setup > Company > Company Information. Example: 1234567_SB1. |
| Application ID | Application identifier generated after saving the integration in Setup > Integration > Manage Integrations. Always include this to ensure proper access. |
| Authentication Mode | TokenBased or OAuthHeadless. SuiteTalk connections require TokenBased. OAuthHeadless connections expire after 7 days and require manual reauthentication. |
| Scope | OAuth only Scopes for OAuthHeadless connections. Accepted values: restlets, rest_webservices, or both separated by a space. |
| Callback URL | OAuth only Redirect URL automatically generated by DataSync for OAuthHeadless connections. Paste it into the NetSuite application configuration. |
| Client ID | OAuth application client identifier from NetSuite. Example: abc123clientid. |
| Client Secret | OAuth application secret from NetSuite. Example: xyz987secretkey. |
| Access Token | TokenBased only Token used for authentication instead of a username and password. Example: abc123accesstoken. |
| Token Secret | TokenBased only Secret used alongside the access token for authentication. Example: xyz987tokensecret. |
| Row Scan Depth | Number of rows scanned to determine column structure. Range: 1–999. Default: 50. |
| Timeout | Time in seconds to wait before a connection attempt or query times out. Long-running queries may take over 10 minutes. For child tables or aggregate columns, set this to 0 to disable the timeout. |
| Include Child Tables | Adds tables for all child lists of an entity. For example, a CashRefund table with an ItemList child appears as CashRefund_ItemList. Useful when you need items as individual rows. May increase total table count significantly. |
| Include Custom Field Columns | Adds custom fields to base tables as individual columns. May slow down the first metadata load. Metadata is cached per connection and cleared when the connection closes. |
| Include Custom List Tables | Adds custom list types as separate tables. May slow down the first metadata load. Metadata is cached per connection and cleared when the connection closes. |
| Include Custom Record Tables | Adds custom record types as separate tables. May slow down the first metadata load. Metadata is cached per connection and cleared when the connection closes. |
| Aggregate Columns | Displays aggregated values from child collections. Requires Include Child Tables to be enabled. |
| Verbosity | Controls how much detail the connector writes to the log. Each level includes everything from the level below it, plus additional detail.
|
| Enable Pooling | Enables connection pooling, which keeps a set of database connections open and reuses them across extractions instead of opening a new connection each time. This reduces overhead and improves performance when multiple extractions run at the same time. |
| Pool idle timeout | Time in seconds a connection can stay idle before returning to the pool. |
| Max Pool Size | Maximum number of connections allowed in the pool at the same time. |
| Pool wait time | Time in seconds DataSync waits for an available connection before throwing an error. |
Additional connection properties
Use this panel to enter connection string properties not available in the Connection Properties panel. For sensitive values such as passwords, set the type to Encrypted. The value is hidden in the interface and stored encrypted in the back end.
| Property | What to enter |
|---|---|
| Property | Connection string property that defines the action or behavior. Example: ReadOnly |
| Value | Value for the property. Example: True |
| Type | Visibility settings: Visible or Encrypted. |
Advanced settings
These settings control how the connector tracks data changes, handles time and regional configuration, and processes records during extraction. Configure them to match your NetSuite environment so that results stay accurate and consistent.
| Setting | What to select |
|---|---|
| Tracking Type | Method for tracking data changes: None or Date. |
| Region | Region setting for the connector, if required by your setup. |
| Time Zone | Time zone matching your NetSuite environment. |
| Time Offset | Refresh offset in seconds to compensate for timing issues in record selection. Minimum 0, maximum 3600. |
| Batch Size | Number of records processed per batch during extraction. Larger batches can improve performance but use more memory. Default is 2000, maximum is 10000. Adjust based on your network speed and disk performance. The default works well in most cases. |
Example setup