MS Dynamics 365 BC Source Connector
The MS Dynamics 365 BC source connector lets DataSync retrieve business data from Microsoft Dynamics 365 Business Central using its available API endpoints and load it into your data warehouse. Setup involves two parts that reference each other: you register an app in the Azure Portal grant DataSync access, then create a source connection in DataSync using the credentials from that app. It helps to keep both the Azure Portal and DataSync open side by side while you work through the steps.
DataSync supports two authentication modes for this connector: OAuth 2.0 and Basic. OAuth 2.0 is recommended and required for cloud deployments.
After creating all required source connections, configure your destination connection to finalize the setup.
Step 1: Set up access in Azure and Business Central
Assign user permissions
- Log in to Dynamic 365 Business Central.
- Select the magnifying glass in the upper‑right corner.
- Search for
Users. - Select Users under Administration.
- Select the user account you want to use for the DataSync connection.
- In User Permission Sets, assign the permissions required for the connection. Changes are saved automatically.
Register an application in Azure Portal
- Log in to the Azure Portal as an administrator.
- Under Azure services, select More services.
- Search for App registrations and select it.
- Click New registration.
- Enter a name for the application and select the supported account types.
- (Optional) Add a redirect URL.
- Return to the App registrations page and select your new registration.
- In the left navigation pane, select API permissions and add the permissions your application needs.
- Grant admin consent if required.
- In the left navigation pane, select Certificates & secrets and create a new client secret.
The secret value is shown only once. Copy and store it securely before leaving the page.
Step 2: Create the source connection in DataSync
Set up the connection
- Log in to DataSync.
- From the welcome screen, select Connections.
- Next to Source Connections, click New.
- Select MS Dynamics 365 BC.
- Enter all required connection properties.
- Copy the Callback URL from the Connection Properties panel.
Add the callback URL in Azure Portal
- Log in to the Azure Portal.
- Under Azure services, select More services.
- Search for App registrations.
- Select your app and select Authentication in the navigation pane.
- Add a Web platform configuration and paste the Callback URL.
- Click Save.
Authenticate and authorize
- (Optional) In the Additional Connection Properties panel, click Add property and enter any extra parameters you need.
- Configure the advanced settings to match your environment, including Tracking Type.
- Click Save. You will be redirected to the Microsoft sign-in screen.
- Log in to complete authentication.
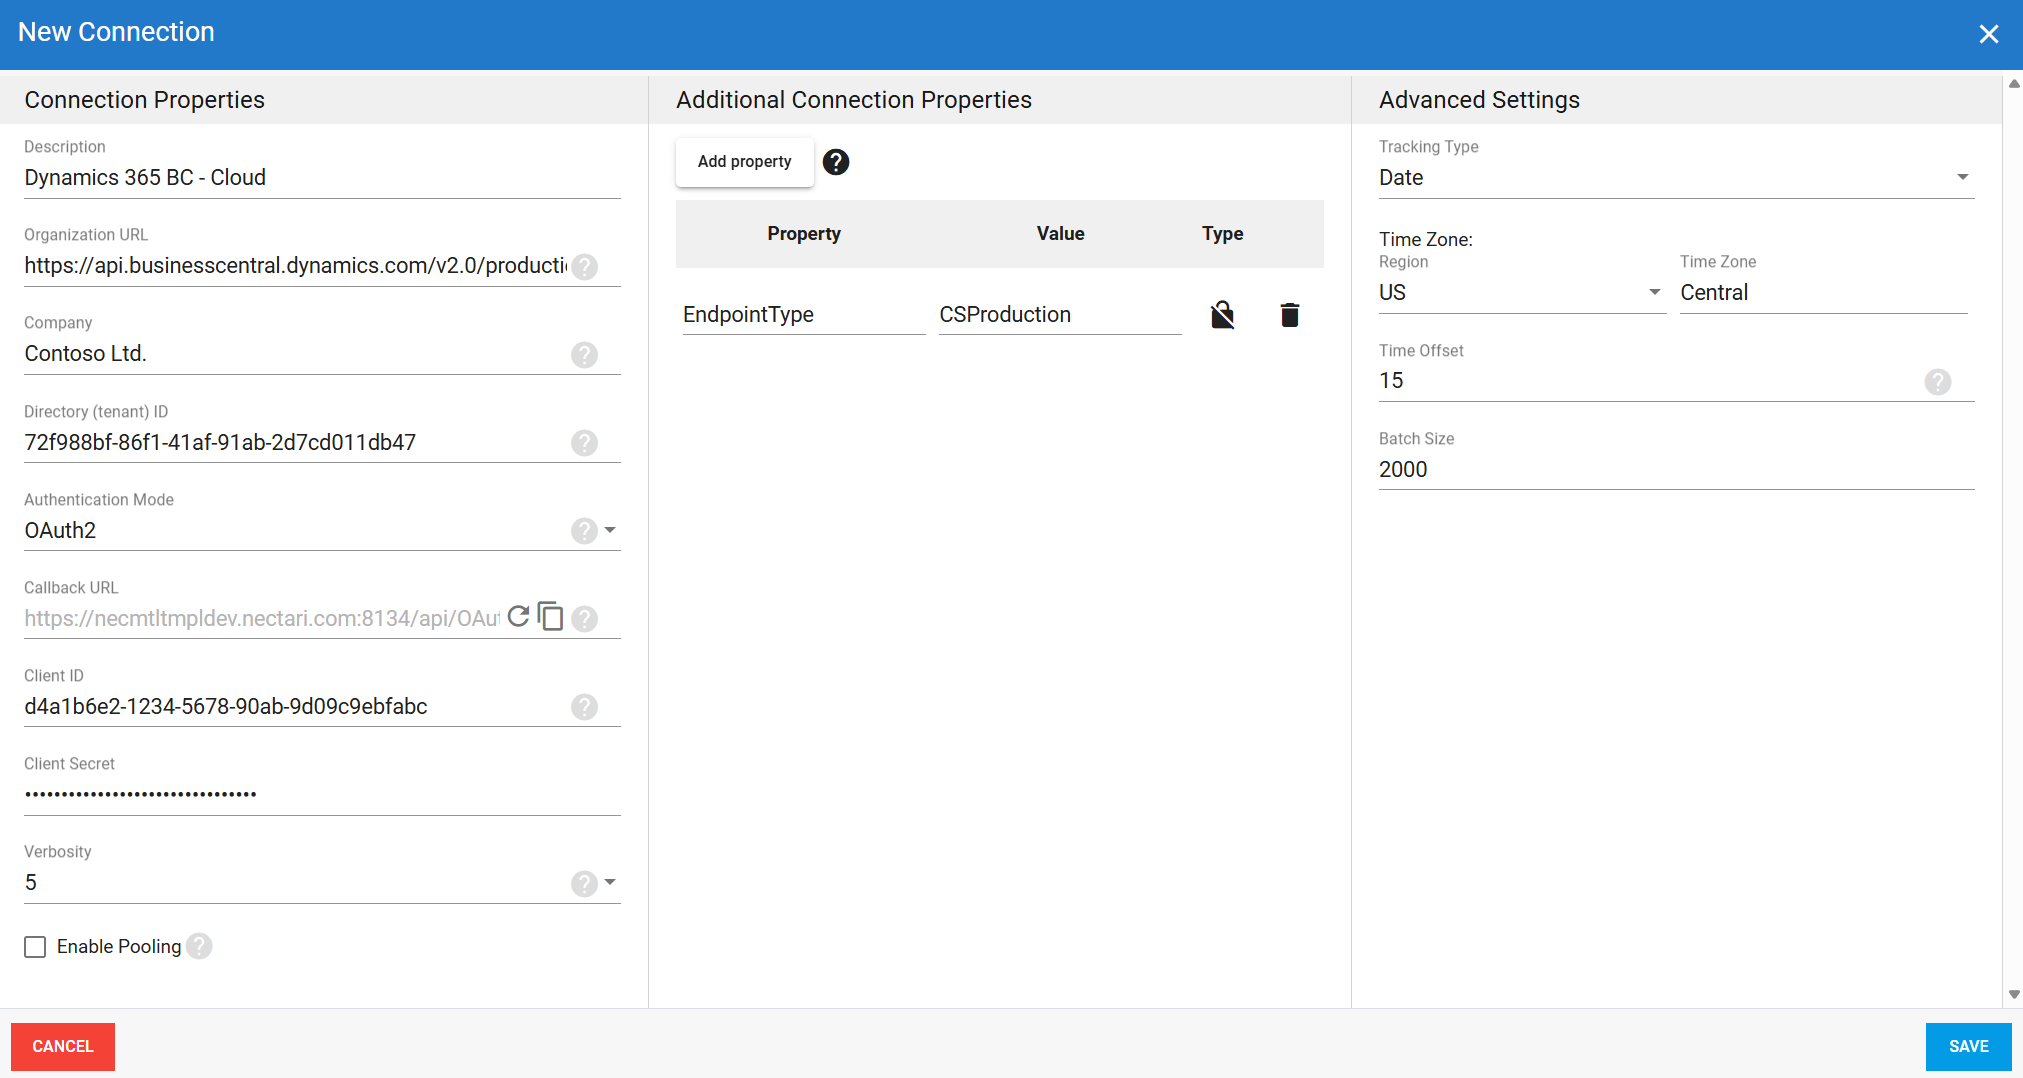
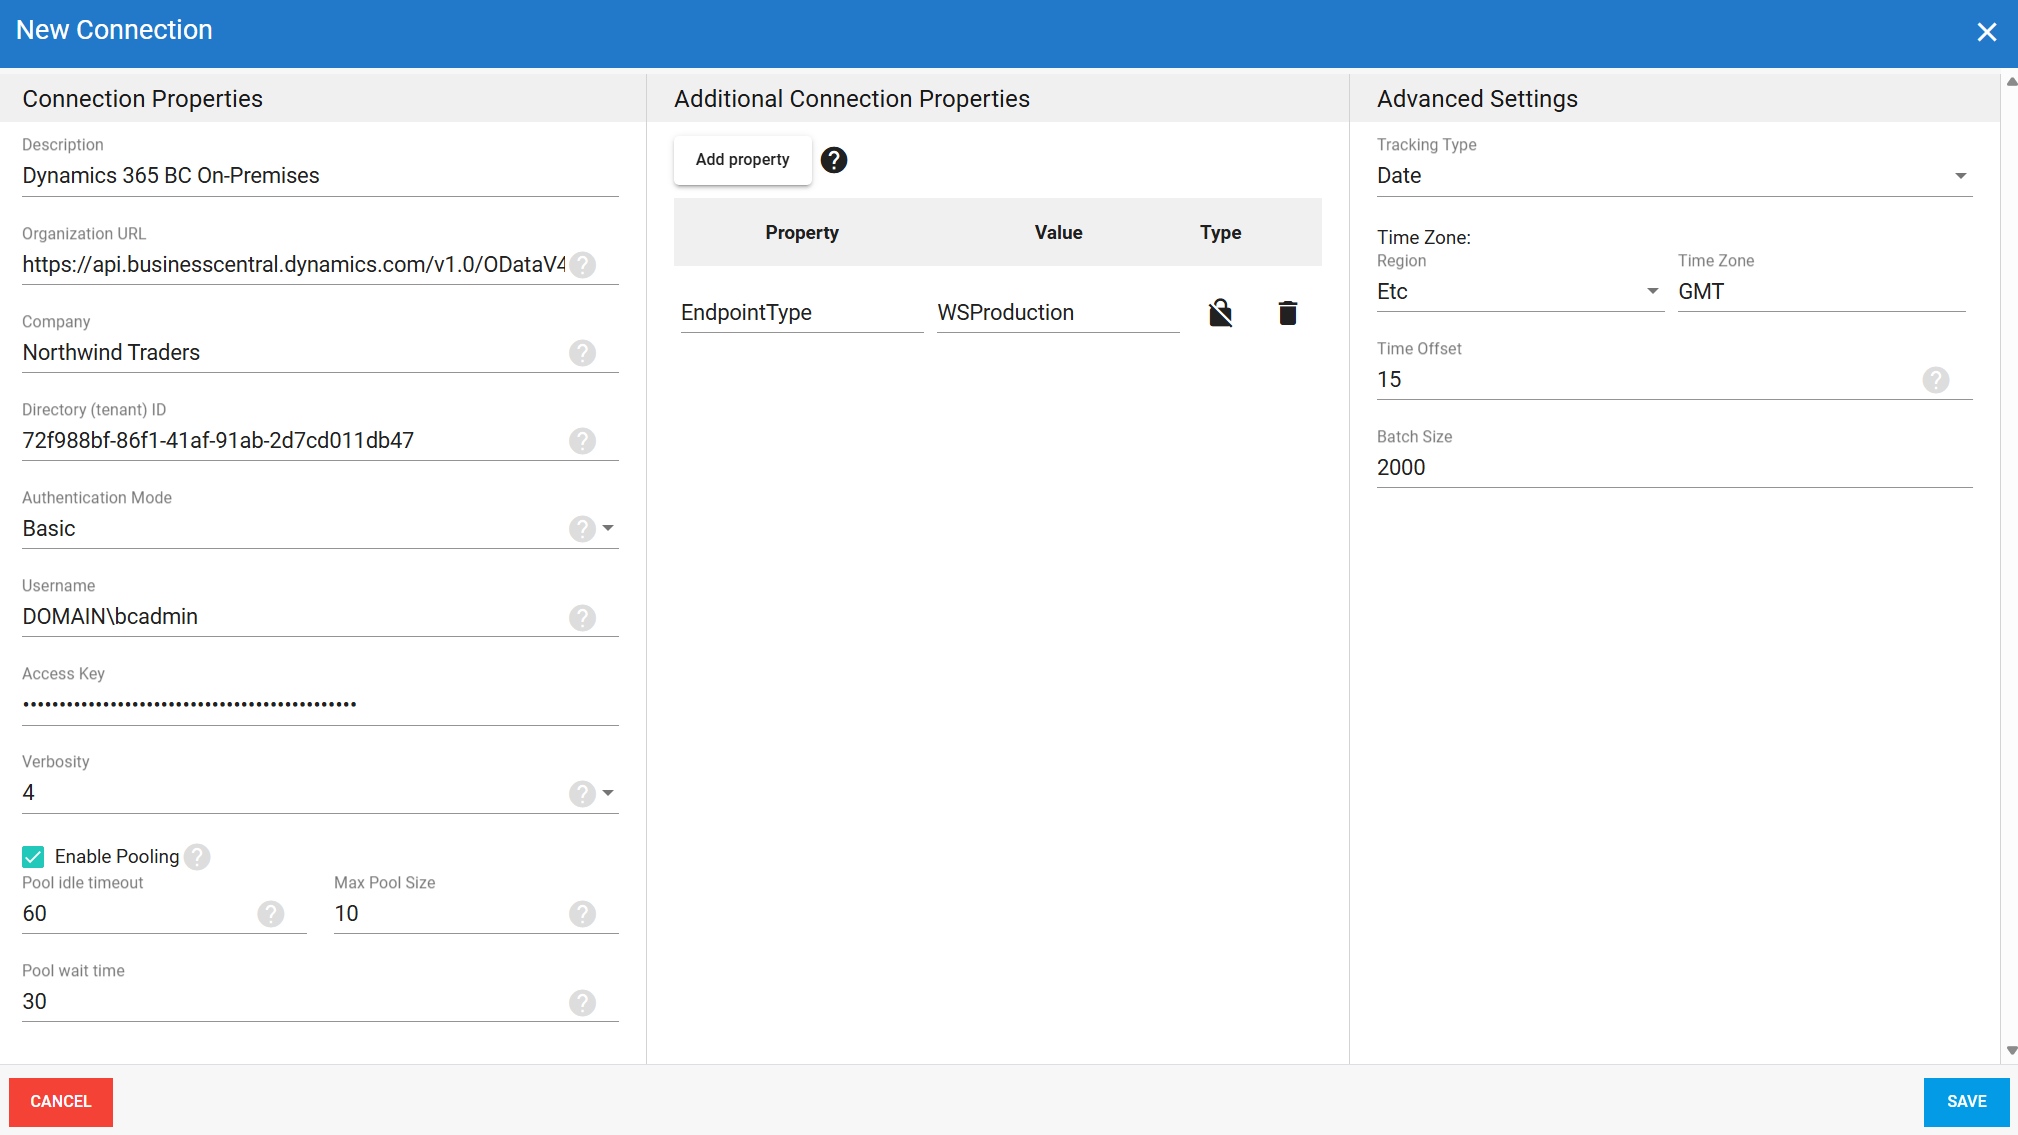
Connection properties
| Property | What to enter |
|---|---|
| Description | Unique name for the connection. Example: MS Dynamics 365 BC |
| Organization URL | API endpoint URL for Business Central. By default, specifying https://businesscentral.dynamics.com/ resolves to a Common Service Production endpoint unless otherwise set via EndpointType. |
| Company | Name of your company exactly as it appears in the API settings. Example: CRONUS International Ltd. |
| Directory (tenant) ID | Azure Active Directory tenant ID. Found in the overview of the app registration in Azure Portal. Example: 72f988bf-86f1-41af-91ab-2d7cd011db47 |
| Authentication Mode | OAuth2 for standard OAuth 2.0 flow (Required for cloud deployments) or Basic for username and password authentication. |
| Callback URL | OAuth only URL automatically generated by DataSync. Must be added to your app registration in Azure Portal. |
| Client ID | OAuth only Application client ID from the app registration overview in Azure Portal. Example: d4a1b6e2-1234-5678-90ab-9d09c9ebfabc |
| Client Secret | OAuth only Secret value created in the Azure Portal. Example: P@ssw0rdValue123 |
| Username | Basic only Login account. Example: DOMAIN\user1 |
| Access Key | Basic only API access key generated in Business Central for the specified user account. Example: MIGfMA0GCSqGSIb3DQEBAQUAA4GNADCBiQKBgQC |
| Verbosity | Controls how much detail the connector writes to the log. Each level includes everything from the level below it, plus additional detail.
|
| Enable Pooling | Enables connection pooling, which keeps a set of database connections open and reuses them across extractions instead of opening a new connection each time. This reduces overhead and improves performance when multiple extractions run at the same time. |
| Pool idle timeout | Time in seconds a connection can stay idle before returning to the pool. |
| Max Pool Size | Maximum number of connections allowed in the pool at the same time. |
| Pool wait time | Time in seconds DataSync waits for an available connection before throwing an error. |
Endpoint types
The Organization URL you enter depends on the type of endpoint you want to connect to. Select the tab that matches your setup.
- Common Service
- Web Service
- Custom API
Common Service
Common Service endpoints provide access to core business data such as accounts, sales orders, and invoices.
| Environment | URL |
|---|---|
| Production | https://api.businesscentral.dynamics.com/v2.0/{environment name}/api/v2.0 |
| Production | https://api.businesscentral.dynamics.com/v1.0/api/v2.0 |
| Production (sandbox) | https://api.businesscentral.dynamics.com/v2.0/sandbox/api/v2.0 |
| Testing | https://api.businesscentral.dynamics.com/v2.0/{tenant id}/{environment name}/api/v2.0 |
| Testing | https://api.businesscentral.dynamics.com/v1.0/{tenant id}/api/v2.0 |
| Testing (sandbox) | https://api.businesscentral.dynamics.com/v2.0/{tenant id}/sandbox/api/v2.0 |
Your Tenant ID is the Azure AD directory ID where Business Central is hosted. Find it in the Azure Portal under Azure Active Directory then Overview. Environment names are available at https://businesscentral.dynamics.com/{tenant id}/admin.
Web Service
Web Service endpoints expose custom content published in Business Central, such as KPIs, reports, entities, and feeds. To see available Web Services, open Business Central, select the magnifying glass, and search for Web Services.
| Environment | URL |
|---|---|
| Production | https://api.businesscentral.dynamics.com/v1.0/ODataV4/ |
| Testing | https://api.businesscentral.dynamics.com/v1.0/{tenant id}/ODataV4/ |
Custom API
Use this format to connect to a custom API published in Business Central:
https://api.businesscentral.dynamics.com/v2.0/{tenant}/api/{API publisher}/{API group}/{API version}
Replace each placeholder with the values from your custom API configuration in Business Central.
Additional connection properties
Use this panel to enter connection string properties not available in the Connection Properties panel. For sensitive values such as passwords, set the type to Encrypted. The value is hidden in the interface and stored encrypted in the back end.
| Property | What to enter |
|---|---|
EndpointType | Endpoint type that the OrganizationUrl resolves to. Possible values:
|
Advanced settings
These settings control how the connector tracks data changes, handles time and regional configuration, and processes records during extraction. Configure them to match your MS Dynamics 365 BC environment so that results stay accurate and consistent.
| Setting | What to select |
|---|---|
| Tracking Type | Method for tracking data changes: None or Date. |
| Region | Region setting for the connector, if required by your setup. |
| Time Zone | Time zone matching your MS Dynamics 365 BC environment. |
| Time Offset | Refresh offset in seconds to compensate for timing issues in record selection. Minimum 0, maximum 3600. |
| Batch Size | Number of records processed per batch during extraction. Larger batches can improve performance but use more memory. Default is 2000, maximum is 10000. Adjust based on your network speed and disk performance. The default works well in most cases. |
Basic authentication example setup
OAuth authentication example setup