Journal Entry
The Journal Entry Writeback template creates balanced general ledger (GL) journal entries in Acumatica directly from a workbook. You can use the template for month end adjustments, accruals, reclassifications, intercompany entries, and other manual GL transactions that contain several debit and credit lines. It uses the NECWRITEBACK formula, generated with the Writeback Wizard, to send changes from your workbook back to Acumatica.
Write a journal entry back to Acumatica
- Fill in the journal entry header.
- Enter the debit and credit lines in the transaction grid.
- Review the journal entry in the Validation column and the Batch Check table, then click Push to Acumatica.
- Click Release to release the entry, if needed.
- Click Reset before you start another journal entry.
Journal entry header fields
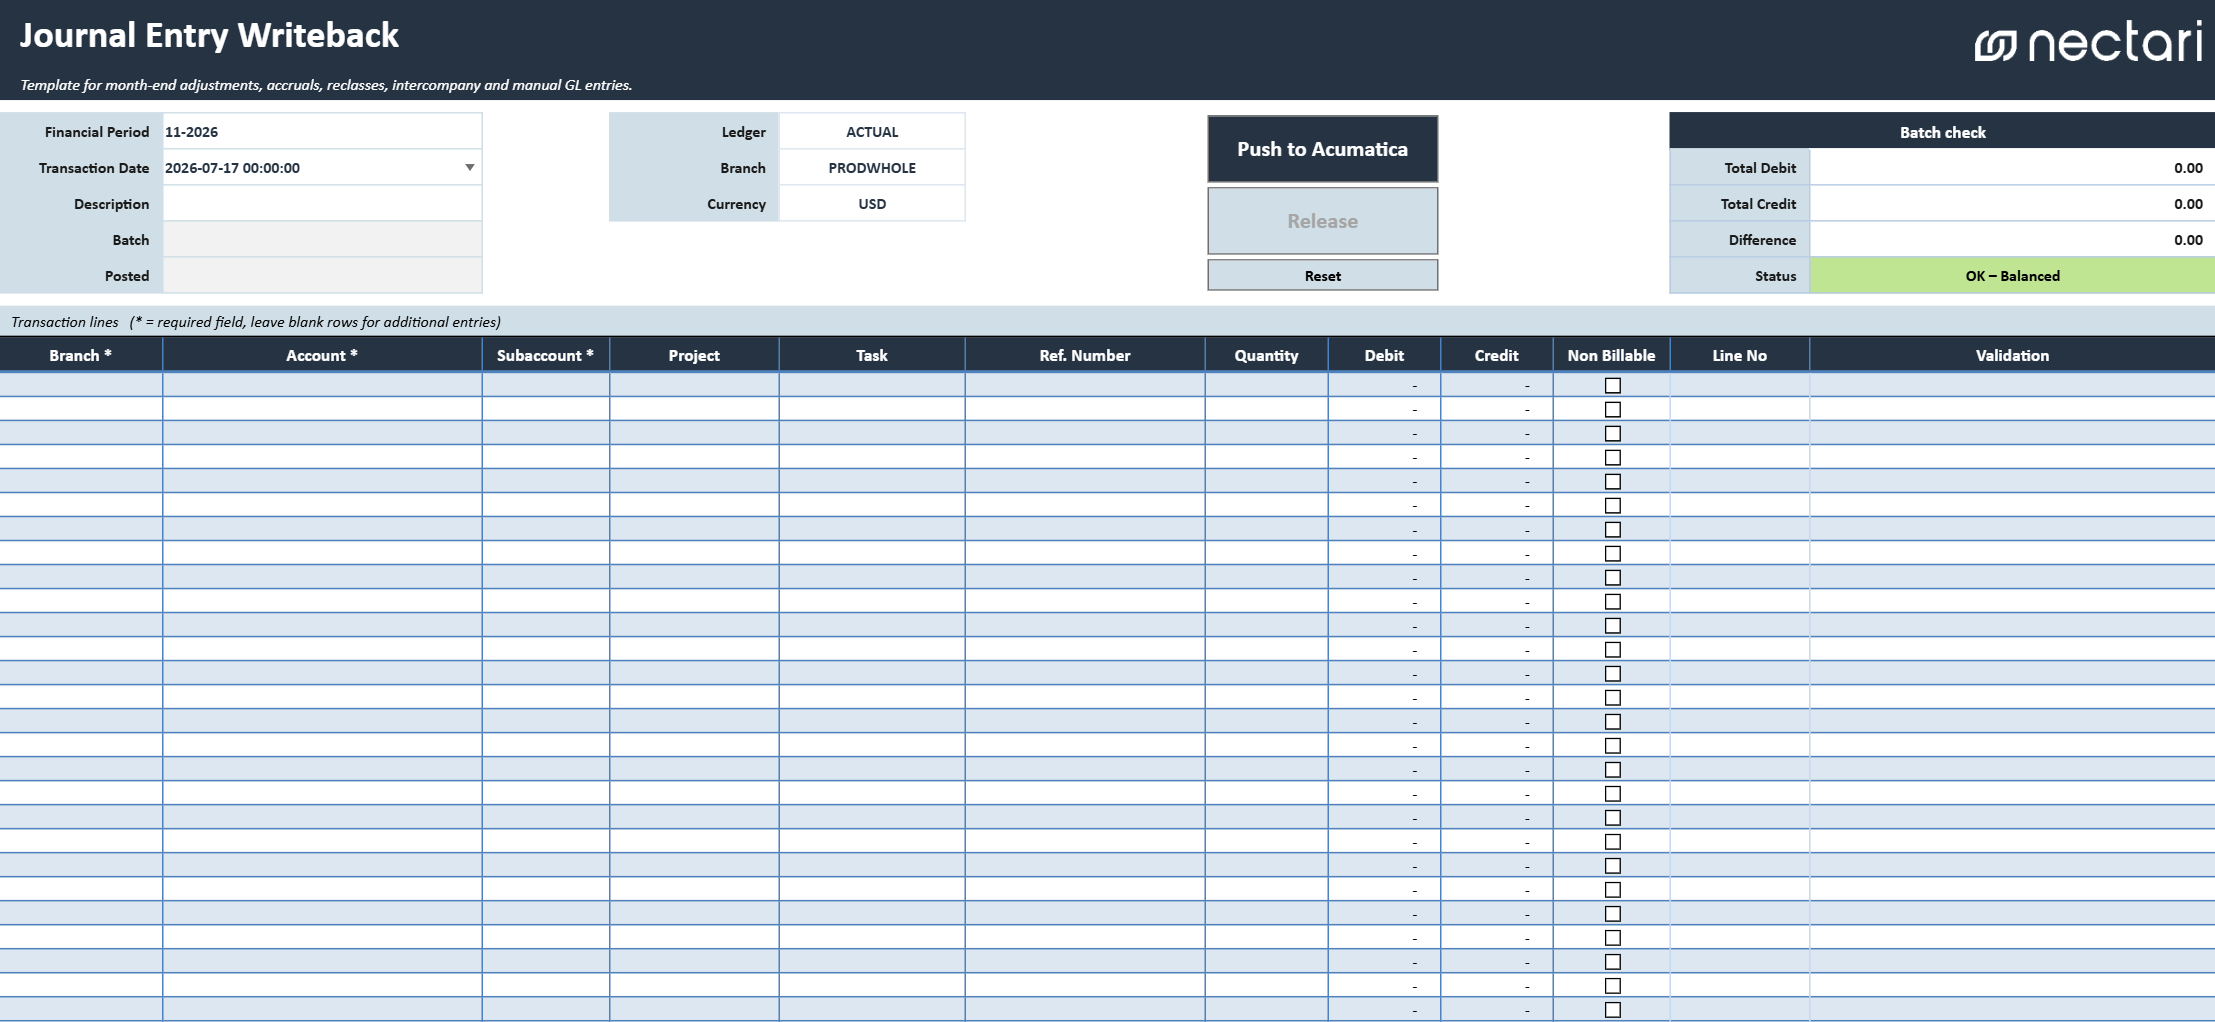
The journal entry header holds the information that applies to every line of the journal entry.
| Header field | What it does |
|---|---|
| Financial Period | Financial period in which the journal entry will be recorded. |
| Transaction Date | Date assigned to the journal entry. |
| Description | Brief description of the purpose of the journal entry. |
| Batch | Batch number that Acumatica returns after a successful writeback, linked to the entry in Acumatica. |
| Posted | Indicates whether the resulting batch has been posted in Acumatica. |
| Ledger | Ledger to which the journal entry will be written. |
| Branch | Default branch for the journal entry. Individual lines may use a different branch. |
| Currency | Currency used for the journal entry. |
Writeback actions
| Writeback action | What it does |
|---|---|
| Push to Acumatica | Validates the completed template and creates the journal entry in Acumatica. A confirmation message indicates whether the writeback succeeded. |
| Release | Releases the journal entry in Acumatica after it has been created. Available only after a successful writeback. |
| Reset | Clears the current journal entry so the template can be used for another entry. Use this only after the current entry has been successfully written back or is no longer needed. |
Journal entry transaction grid
The transaction grid contains the debit and credit lines of the journal entry. Each line holds either a debit or a credit, never both. Columns marked with an asterisk (*) are required on every line you fill in.
| Transaction column | What it shows |
|---|---|
| Branch * | Branch assigned to the transaction line. |
| Account * | General ledger account to debit or credit. |
| Subaccount * | Subaccount associated with the selected account. |
| Project | Project associated with the transaction, when applicable. |
| Task | Project task associated with the transaction, when applicable. |
| Ref. Number | Optional reference used to identify or trace the transaction. |
| Quantity | Optional quantity associated with the journal line. |
| Debit | Debit amount for the transaction line. Leave blank when entering a credit. |
| Credit | Credit amount for the transaction line. Leave blank when entering a debit. |
| Non Billable | Indicates that a project related transaction should not be billed. |
| Line No | Automatically calculated line number. Do not edit this field. |
| Validation | Displays missing field errors, invalid combinations, or confirmation that the line is ready. |
Review the journal entry before writeback
You can write the journal entry back to Acumatica only when every required field is complete, no line shows an error, and total debits equal total credits. After the writeback, the journal entry stays unreleased in Acumatica until you click Release or release the entry in Acumatica.
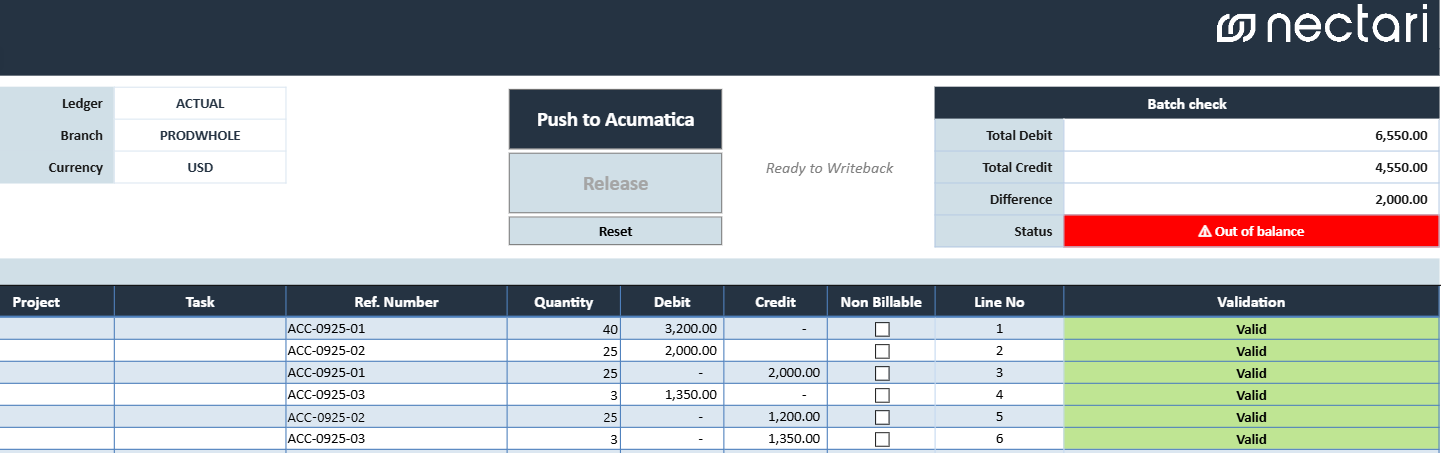
- Complete every required (*) field on each line you filled in.
- Correct every error in the Validation column.
- Check in Batch Check that Total Debit equals Total Credit and the difference is zero.
- Confirm that the Status shows OK – Balanced.
The Status shows Out of balance when total debits and total credits don't match. Correct the line amounts until Difference is zero.