Sign In
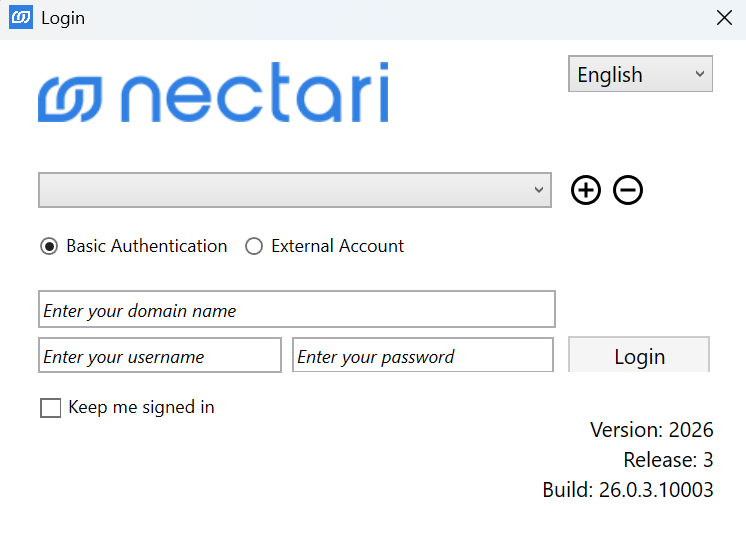
When you open an Excel file that contains SEI features, the sign-in dialog opens automatically. If the file has no SEI features, it opens the first time you select anything in the Add-ins tab. Two authentication methods are available: Basic Authentication for username and password login, and External Account for SSO. Which one appears depends on your Central Point configuration.
The bottom-right corner of the dialog shows the current Version, Release, and Build numbers. Check these to confirm you are running the latest version of the Add-in.
Basic Authentication
- Open Microsoft Excel.
- In the Add-ins tab, select any feature.
- Select your language from the dropdown.
- Select or add a Central Point.
- Select Basic Authentication.
- (Optional) Enter a Domain if your organization uses Active Directory.
- Enter your Username and Password.
- (Optional) Turn on Keep me signed in to stay connected until you manually sign out.
- Select Login.
External Account
External Account must be enabled on your Central Point before it becomes available. If your Central Point does not support SSO, the dialog shows: External Accounts are unavailable for this Central Point.
- Open Microsoft Excel.
- In the Add-ins tab, select any feature.
- Select your language from the dropdown.
- Select or add a Central Point.
- Select External Account.
- Pick your external account from the list.
- Complete the login through your SSO provider.
- Select Login.
Sign-in dialog settings
| Setting | What it does |
|---|---|
| Language | Sets the interface language. Supported languages: English, French, Spanish, Portuguese, Italian, German, Turkish, Simplified Chinese, and Traditional Chinese. |
| Central Point | Shows the active Central Point. Switch to another one from the dropdown, or select + to add a new one. |
| Login Option | Switches between Basic Authentication and External Account. |
| Domain | (Optional) Only needed if your organization uses Active Directory. |
| Username | Your Basic Authentication username. |
| Password | Your Basic Authentication password. |
| External Accounts | The SSO options available for your Central Point. |
| Keep me signed in | Keeps you signed in until you manually sign out. |
| Login | Confirms your credentials and loads the Add-in features. |
Add a Central Point
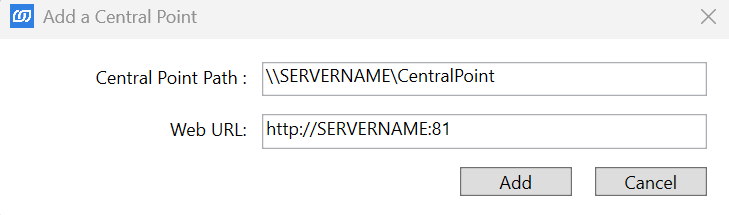
If your Central Point is not in the dropdown, add it manually. Contact your administrator if you are not sure what values to enter.
- In the sign-in dialog, select the + icon next to the Central Point field.
- Fill in the fields for your deployment type.
- Select Confirm. The new Central Point appears in the dropdown.
Deployment types
- On-premise
- Cloud
On-premise
Enter the network path to your Central Point and the URL of the web server. Both values are set during installation. Contact your administrator if you do not have them.
| Field | Example |
|---|---|
| Central Point Path | \\SERVERNAME\CentralPoint |
| Web URL | http://SERVERNAME:81 |
Cloud
Enter the URL your administrator gave you when your cloud environment was set up.
| Field | Example |
|---|---|
| Cloud URL | mycompany.clouddomain.com |