Project Cost Forecast
The Project Cost Forecast Writeback template revises project budget quantities, amounts, and completion percentages in Acumatica directly from a workbook. You can use the template for estimate to complete updates on construction projects, revised task budgets, project cost reforecasts, and ongoing tracking of the percentage complete. It uses the NECWRITEBACK formula, generated with the Writeback Wizard, to send changes from your workbook back to Acumatica.
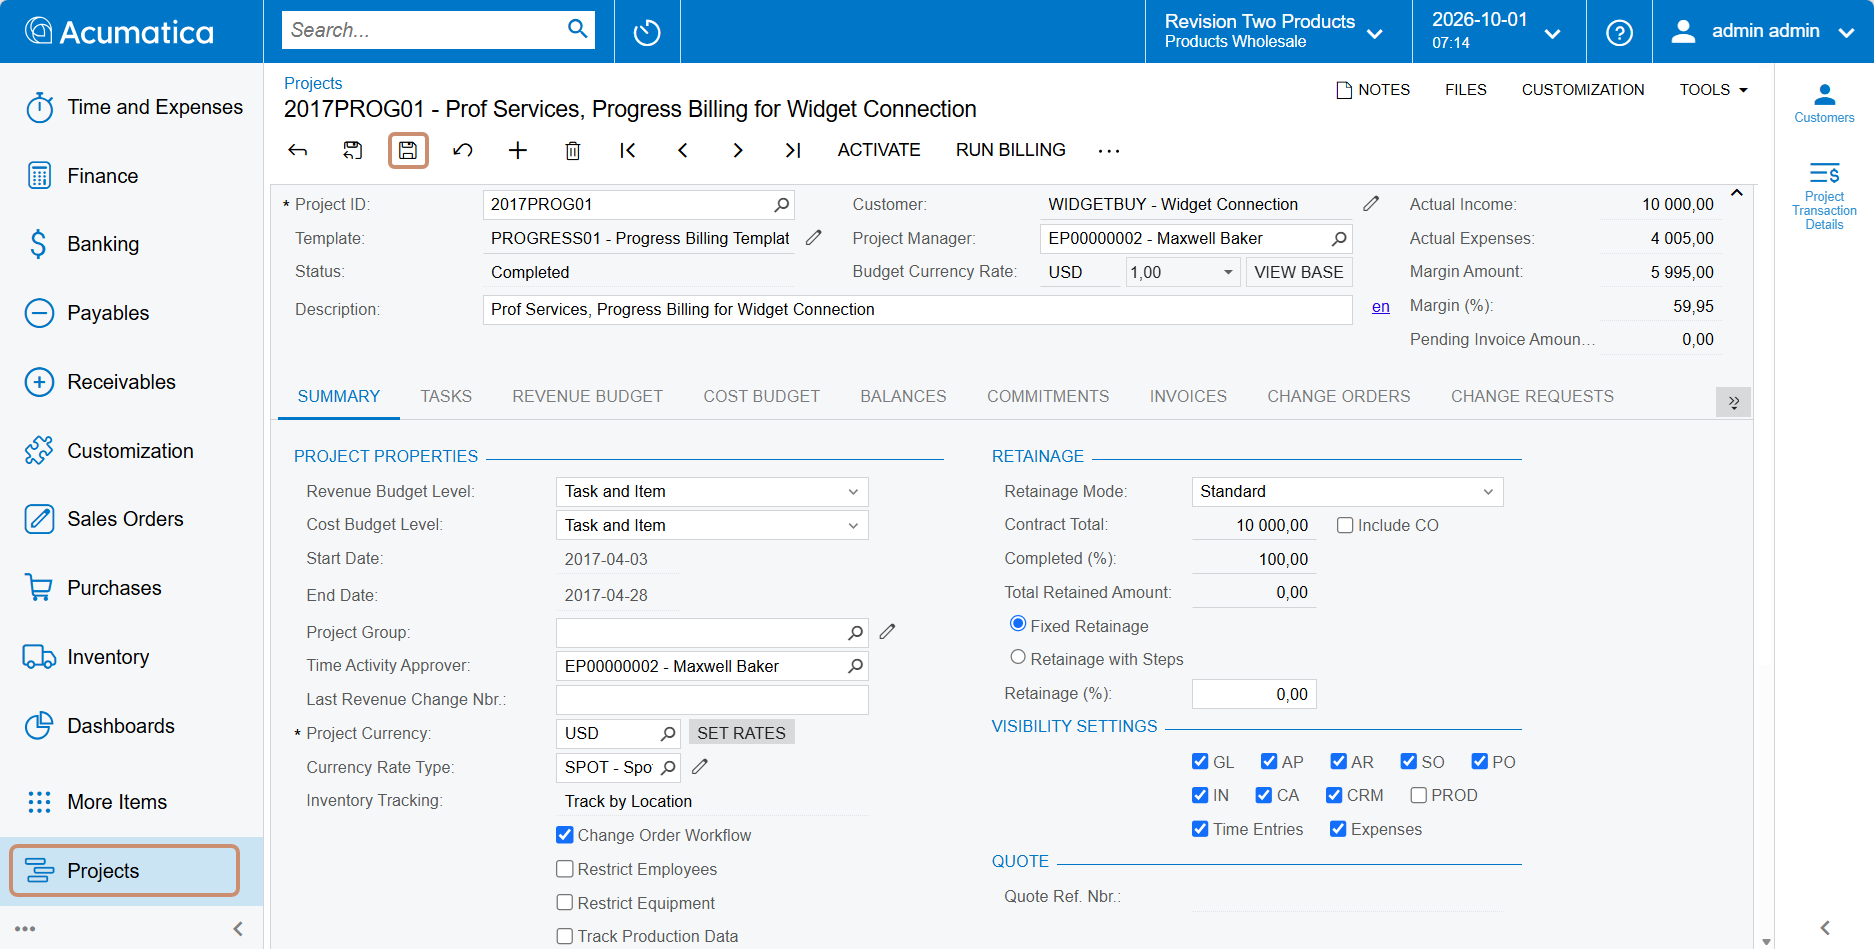
Enable Change Order Workflow for the project in Acumatica before you update revised quantities or revised amounts.
Write a project cost forecast back to Acumatica
- Select the Project and review the project header fields.
- Click Initialize to create a copy with static data.
- Update the green columns in the project cost grid.
- Review the project, then click Push to Acumatica.
- Click Reset before you start another project cost forecast.
Project header fields
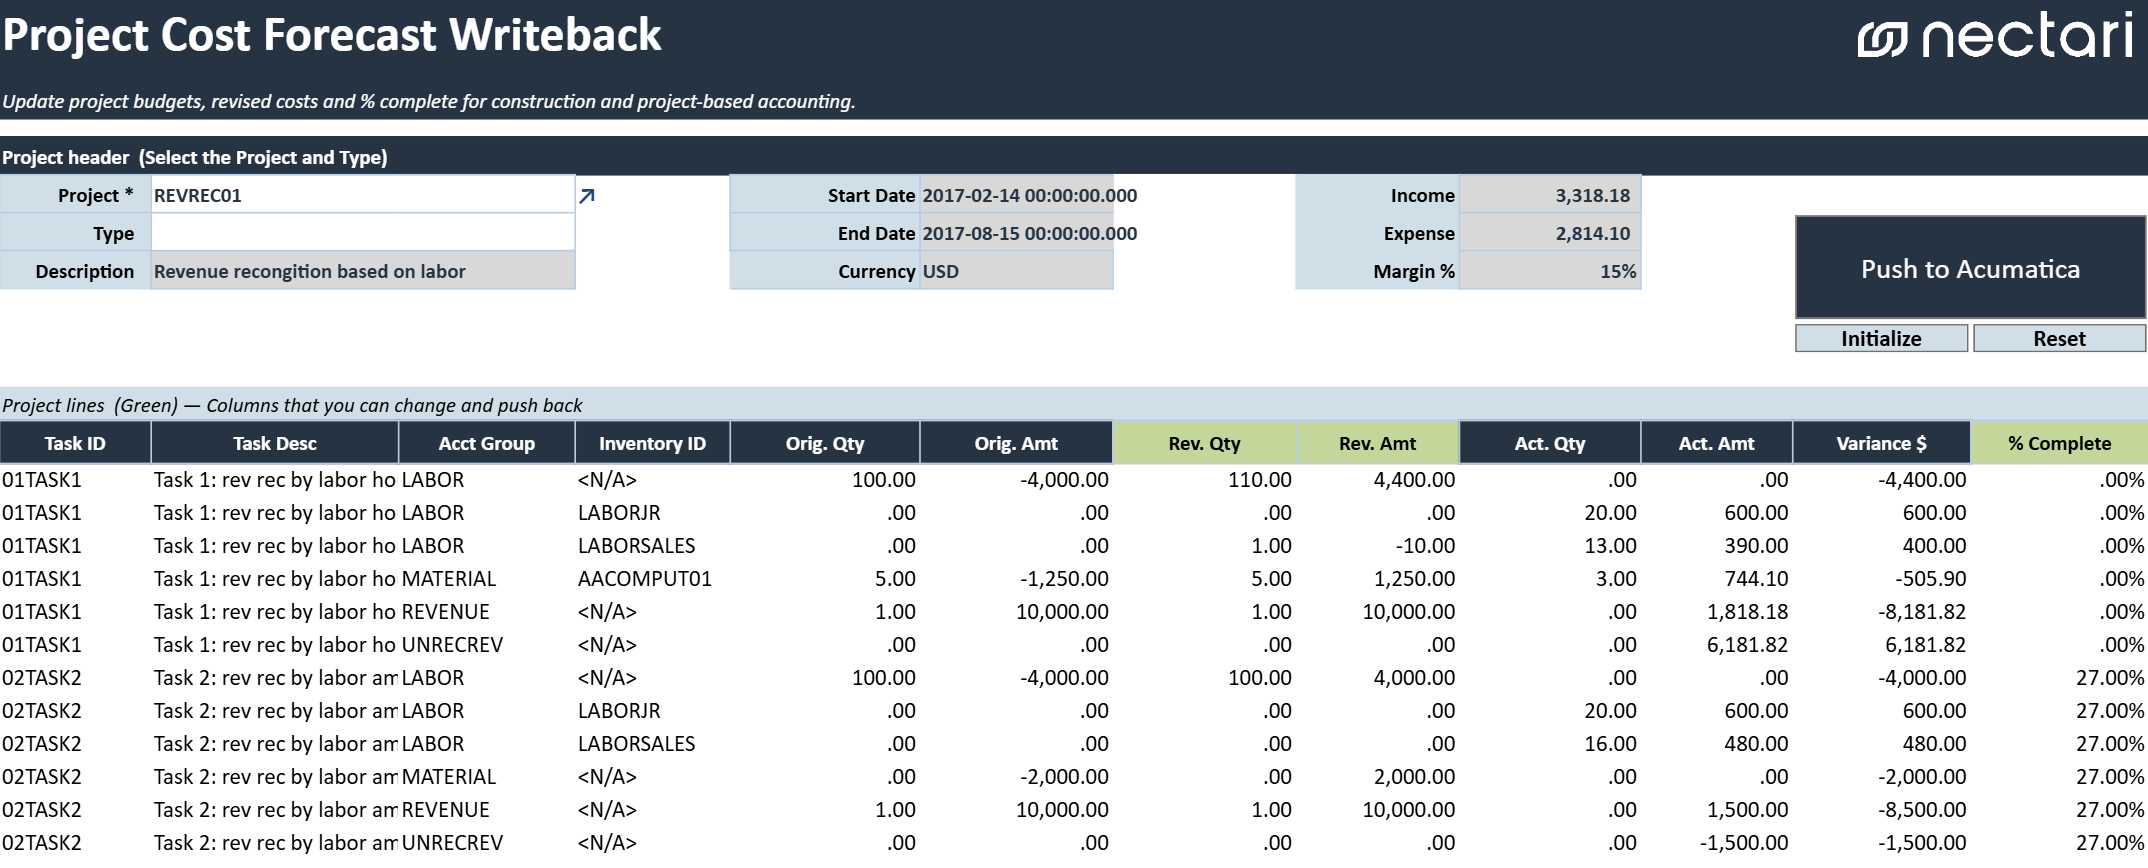
The project header identifies the project and its key information. When you select a Project, the template loads the other header fields and the budget lines of that project.
| Header field | What it contains |
|---|---|
| Project | Project whose budget lines will be reviewed and updated. |
| Type | Project type associated with the selected project. |
| Description | Description of the selected project. |
| Start Date | Project start date. |
| End Date | Project end date. |
| Currency | Currency used by the project. |
| Income | Total project income. |
| Expense | Total project expense. |
| Margin % | Project margin percentage based on the displayed income and expense values. |
Writeback actions
| Writeback action | What it does |
|---|---|
| Initialize | Creates a separate workbook copy with (Initialized) added to the file name. Extracted data is made static in this copy so it remains available while forecast values are entered. |
| Push to Acumatica | Validates and writes the revised quantities, revised amounts, and completion percentages to the selected project in Acumatica. |
| Reset | Clears the current changes and restores the workbook to its last saved state. Any unsaved entries or edits are removed. |
Project cost grid
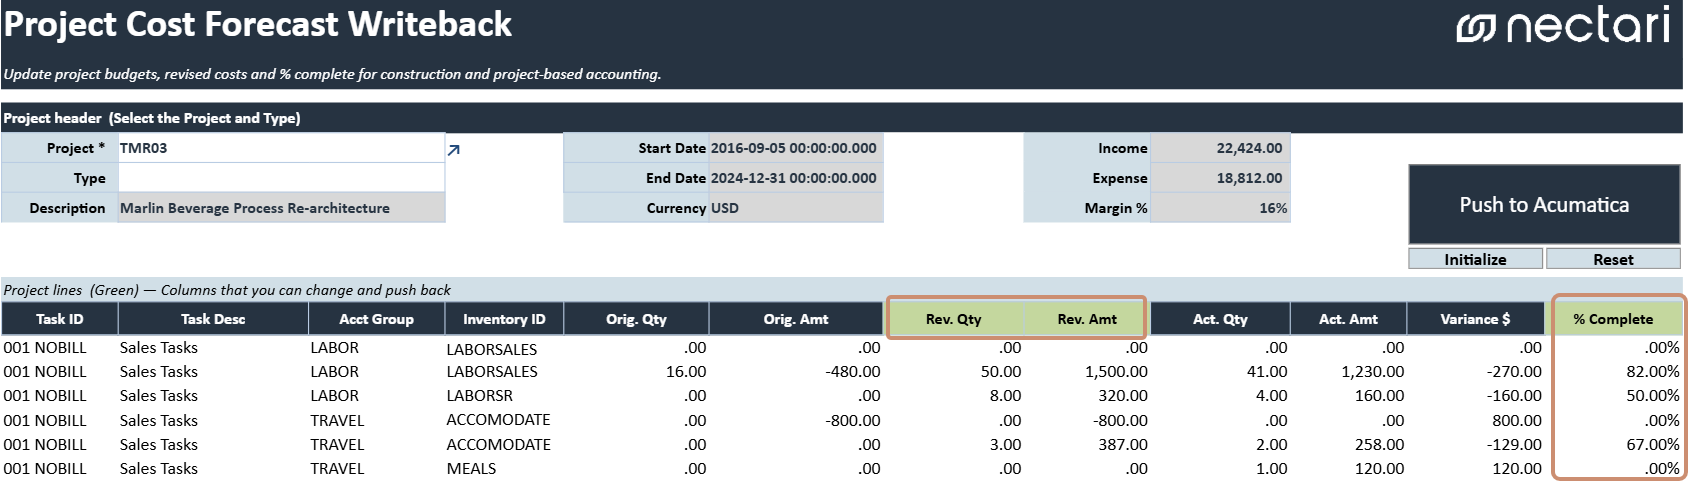
The project cost grid lists the budget lines of the project by task, account group, and inventory item. You can edit only the green columns, Revised Quantity, Revised Amount, and % Complete, which the template writes back to Acumatica.
| Project cost column | What it contains |
|---|---|
| Task ID | Project task associated with the budget line. |
| Task Description | Description of the project task. |
| Account Group | Account group assigned to the budget line. |
| Inventory ID | Inventory item associated with the budget line, when applicable. |
| Original Quantity | Original budgeted quantity. |
| Original Amount | Original budgeted amount. |
| Revised Quantity | Updated budget quantity to write back to Acumatica. |
| Revised Amount | Updated budget amount to write back to Acumatica. |
| Actual Quantity | Actual quantity recorded against the budget line. |
| Actual Amount | Actual amount recorded against the budget line. |
| Variance $ | Difference between the revised budget and actual amount. |
| % Complete | Estimated completion percentage for the budget line. |
Review the project before writeback
- Confirm that the correct Project is selected.
- Review the project dates, currency, income, expense, and margin.
- Compare the Revised Quantities and Revised Amounts with the latest estimate.
- Confirm that the completion percentages are consistent with project progress.
Enable the change order workflow for a project in Acumatica
- Log in to Acumatica.
- In the main menu, select Projects. If you don't see it, click More Items.
- Under Profiles, click Projects.
- Select the project in the list, then click the pencil icon.
- On the Summary tab, select the Change Order Workflow checkbox.
- Click Save.