Acumatica Data Source
Acumatica is a cloud-based ERP platform that manages your financial, operational, and business data. By connecting Acumatica to SEI, you can use that data directly in your views and dashbaords, keeping everything up to date without manual exports or data preparation.
SEI supports two ways to authenticate with Acumatica: Basic authentication using a username and password, or OAuth 2.0 for a more secure, token-based connection. Choose the method that matches your Acumatica environment configuration.
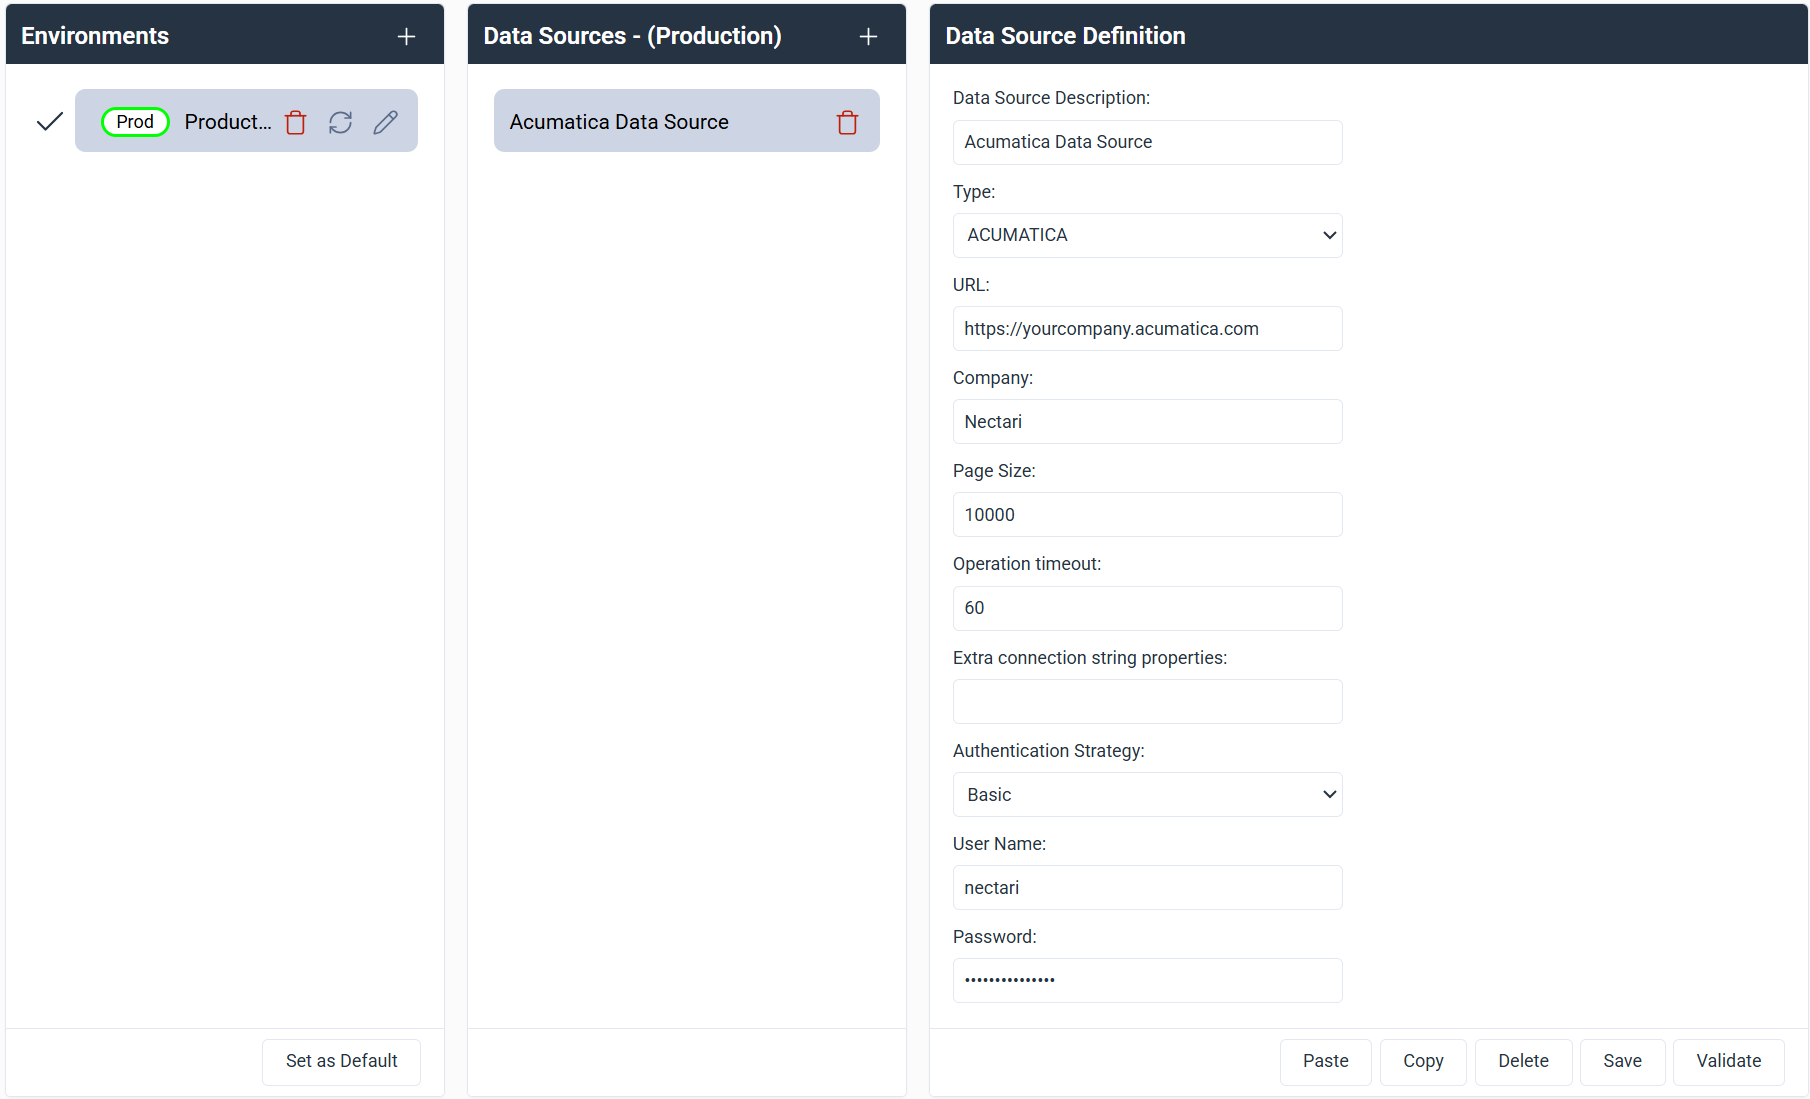
Configure Basic Authentication
Use Basic authentication when connecting with a standard Acumatica username and password. This is the simplest way to connect and requires no additional setup in Acumatica.
| Field | Description |
|---|---|
| Data Source Description | Enter a unique name for this data source. For example, Acumatica Data Source. |
| Type | Select Acumatica. |
| URL | Enter the base URL of your Acumatica site. For example, https://yourcompany.acumatica.com. |
| Company | Enter the Acumatica company name you want to connect to. |
| Page Size | Enter the maximum number of records returned per request. The default is 10000. |
| Operation timeout | Enter the maximum time in seconds allowed for each request. The default is 60. |
| Extra connection string properties | Optional. Enter any additional connection string parameters required by your database provider. |
| Authentication Strategy | Select Basic. |
| User Name | Enter the username for authenticating with Acumatica. |
| Password | Enter the password for the specified user. |
Example
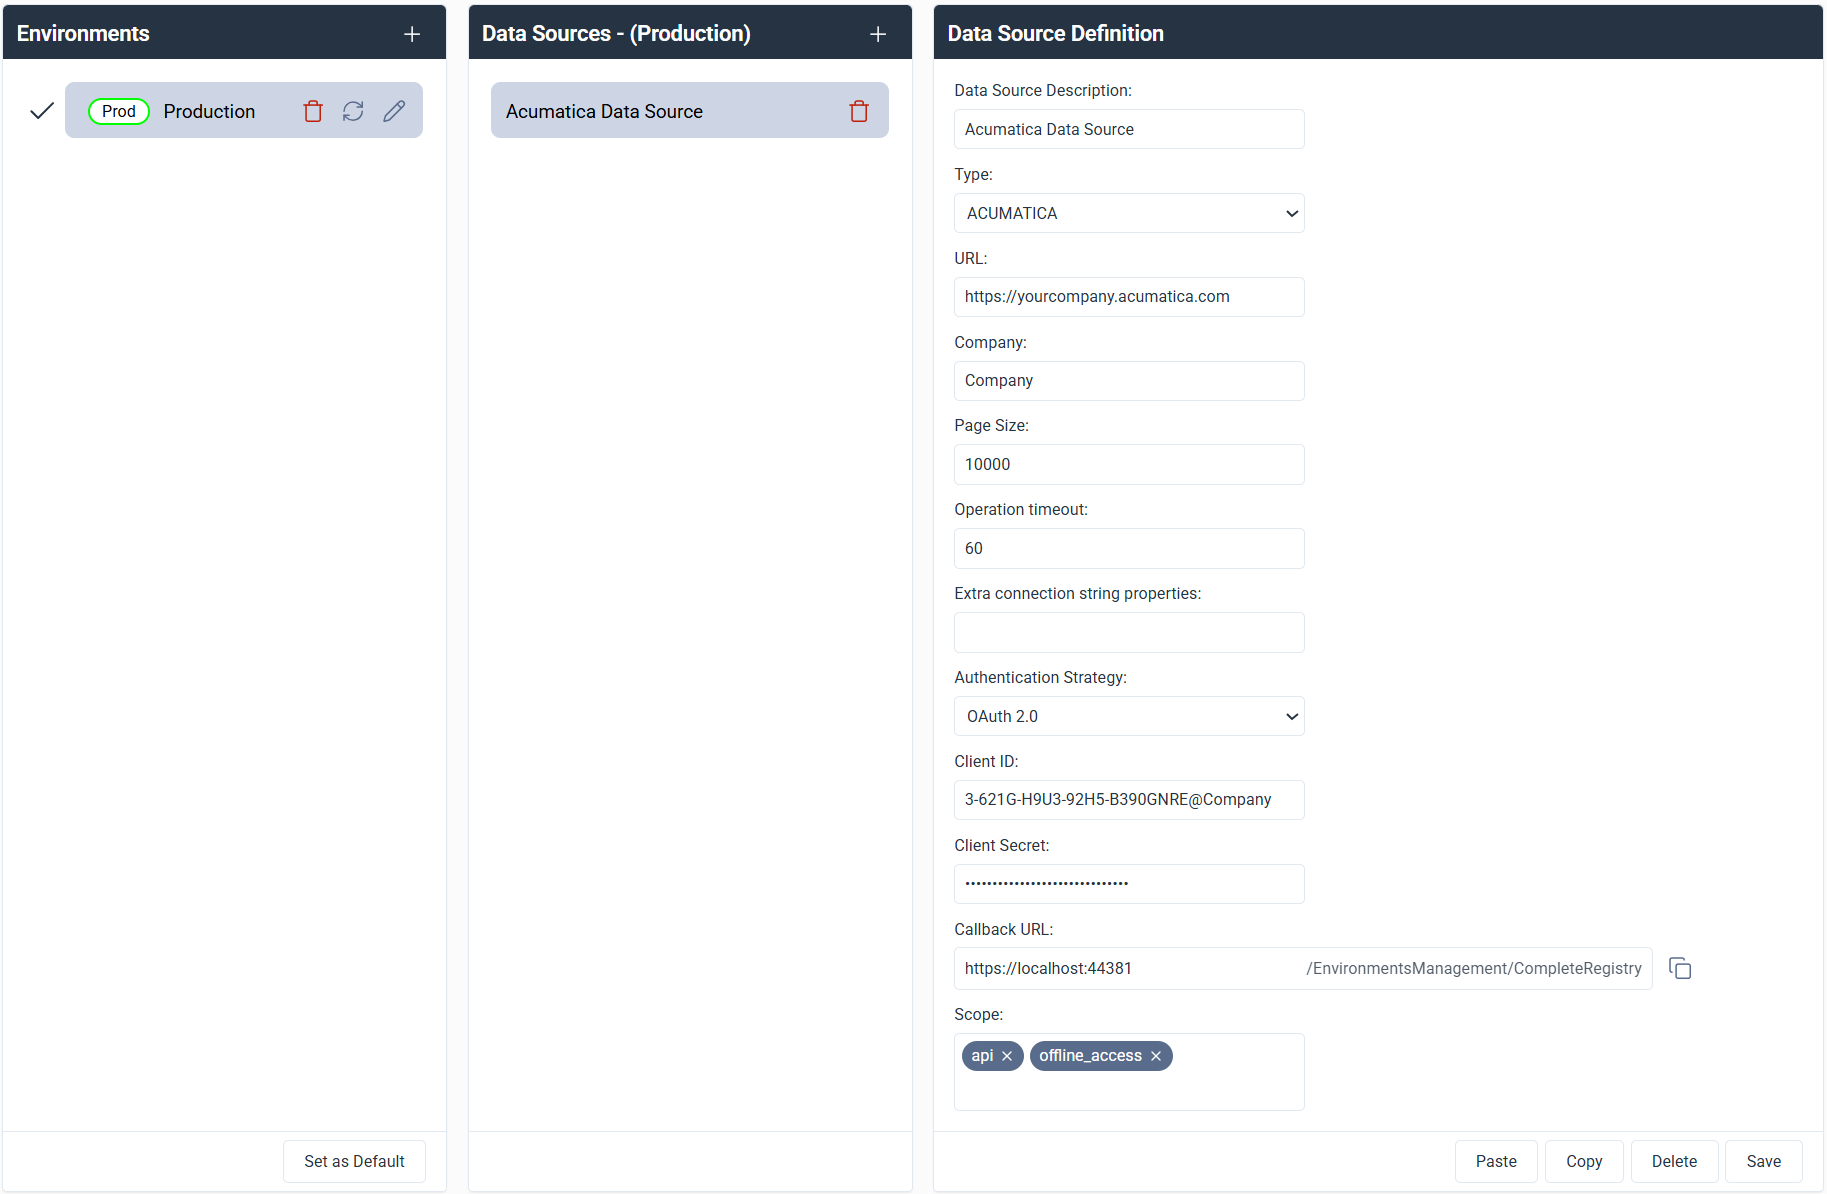
Configure OAuth 2.0 Authentication
Use OAuth 2.0 when connecting through a registered application with delegated access. This method is more secure than Basic authentication and is recommended when your Acumatica environment supports it. Before filling in the fields below, you need to register an application in Acumatica to obtain your Client ID and Client Secret.
| Field | Description |
|---|---|
| Data Source Description | Enter a unique name for this data source. For example, Acumatica Data Source. |
| Type | Select Acumatica. |
| URL | Enter the base URL of your Acumatica site. For example, https://yourcompany.acumatica.com. |
| Company | Enter the Acumatica company name you want to connect to. |
| Page Size | Enter the maximum number of records returned per request. The default is 10000. |
| Operation timeout | Enter the maximum time in seconds allowed for each request. The default is 60. |
| Extra connection string properties | Optional. Enter any additional connection string parameters required by your database provider. |
| Authentication Strategy | Select OAuth 2.0. |
| Client ID | Enter the client ID generated when you registered the application in Acumatica. |
| Client Secret | Enter the client secret generated with the client ID. |
| Callback URL | Automatically generated by SEI. Copy this URL and paste it into your Acumatica application. |
| Scope | Enter the required scopes. The default scopes are api and offline_access. |
Get the Client ID and Client Secret
To connect using OAuth 2.0, you first need to register a connected application in Acumatica. This generates the Client ID and Client Secret required by SEI.
- In Acumatica, select Integration. If it is not visible, select More Items to show additional options.
- Under Preferences, select Connected Applications.
- Select the + icon to add a new record.
- In Client Name, enter
OAuthor another unique name. - In Flow, select Authorization Code.
- Select Save. The Client ID is generated automatically.
- Select the Secrets tab and select Add Shared Secret.
- Enter a description for the secret.
- Copy the value shown in the Value field and store it securely. You will not be able to view it again after saving.
- Select Ok.
Add the Callback URL in Acumatica
Once you have your Client ID and Client Secret, register the Callback URL from SEI in Acumatica to complete the OAuth 2.0 setup.
- In Acumatica, select Integration. If it is not visible, select More Items to show additional options.
- Under Preferences, select Connected Applications.
- In Client ID, select the connected application you created earlier.
- Select the Redirect URIs tab.
- Select the + icon to add a row.
- In SEI, copy the full Callback URL from the data source definition panel.
- Paste the URL into the new row in Acumatica.
- Select Save.
Example